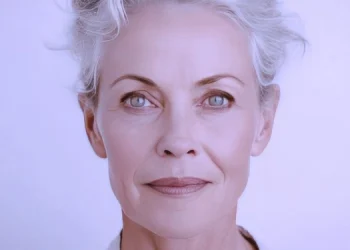
Have you ever looked in the mirror and realized your foundation looked heavy or cakey? Here’s how to cover age spots with makeup so your skin still looks like skin.
As a makeup artist who specializes in working with women over 50, one of the questions I get most often is this: How do I cover up the redness, age spots, and discoloration on my face without my makeup looking heavy and cakey? Today I’m answering that question with five secrets for creating a flawless complexion that looks natural, soft, and beautiful.
Start With Skin Care Before You Reach For Coverage
Before we talk about the five secrets, we need to spend a couple of minutes on skin care, because these steps are extremely important. As most of us know, there’s no way we can look our best without taking a few moments to prep our skin before applying our makeup.
Exfoliate Twice A Week
The first important skin care step is to exfoliate twice a week, unless you have rosacea. Exfoliating keeps the dead skin cells that accumulate on our face from building up and causing problems like clogged pores, uneven skin texture, and dull skin. Dead skin cells can also lead to bacterial infections and acne breakouts.
Removing dead skin cells through exfoliation also improves blood circulation in the skin’s tissues, which helps our skin look better. And it allows our skin care products to penetrate the skin more effectively. Since we’re paying good money for skin care, we definitely want it to work as hard as possible.
Use A Lighter Moisturizer During The Day
The second skin care step is to moisturize, but save the heavier moisturizer for night and use a lighter one during the day. It’s very easy for makeup to sink into our skin if we apply too much product or use products that are too thick or heavy. Be sure to let your moisturizer fully sink in and dry before you apply any makeup.
5 Secrets For Natural Coverage That Never Looks Cakey
Now let’s get to those five secrets for covering age spots and discoloration without leaving our skin looking cakey.
Secrets 1 And 2: How To Cover Age Spots With Makeup Where You Need It Most
The first secret is how to apply coverage, and the second is where to apply it.
Start by giving any liquid foundation a good shake. The way most of us store our foundation allows the pigments to settle at the bottom, which can affect the overall color, and the oils can separate too. Once it’s well shaken, squeeze or pump a small amount onto the back of your hand. Then pick up a little with your finger, brush, or sponge.
Here’s the most important part: only apply foundation to the areas where you need the most coverage, not necessarily all over your face. For most of us, that’s the center of the face, including the forehead, nose, chin, and cheeks. Some of us also have age spots in other areas that need attention.
For instance, I have age spots along the lower part of my jawline, including my biggest one. Unfortunately, for many years I didn’t wear SPF when I was driving, and this is the side of my face that always faced the window. If only I’d worn sunscreen all those times I was driving!
It’s also important to apply foundation to just one of these areas at a time, since foundation can quickly settle into the skin, and we don’t want it to dry before we blend it in. We want just one light layer. We can always add a second layer if we need it, but if we want to avoid a cakey look, it’s best to build one light layer at a time. Then blend the foundation outward toward the edges of your face. This way, you get the most coverage right where you need it most.
To show you, I dotted my medium coverage Kosas Revealer Skin-Improving Foundation onto the center of my face, on just one side, and immediately blended it in that area only before moving anywhere else. Since I still had foundation on my brush, I blended it outward so I wasn’t putting heavy amounts of foundation all over my face.
My age spots were still showing a bit, so I added just a little more coverage there. Press first to get the most coverage, then blend. This way I got the coverage I needed along my jawline and over my age spots, but it doesn’t look thick or heavy, because I started with a small amount where I needed it most and spread it out more thinly.
Applying and blending foundation in one small area at a time really ensures that it doesn’t settle into our skin unevenly, which can also make it look cakey. Pay special attention to the marionette lines and the lines around the mouth, where we’re apt to get a cakey-looking buildup. That’s exactly why we want only a very thin layer there.
Secret 3: Finish With A Barely Damp Makeup Sponge
Secret number three is to go back over your entire face with a very slightly dampened makeup sponge. That means a sponge you’ve not only squeezed all the water out of with your hand, but also wrapped in a paper or cloth towel and given a second squeeze.
That second squeeze is important. It makes sure the sponge is only very slightly damp, so it doesn’t absorb a lot of your makeup, just the excess. Using a sponge this way ensures your makeup doesn’t look cakey. Plus, it feels so wonderful, and it gives your skin a little extra moisture, which is a good thing too.
Secret 4: Choose A Lightweight Foundation With Greater Coverage
Secret number four is for those of us who need more coverage. Believe it or not, it is possible to wear a foundation with greater coverage and still avoid a cakey look. The secret is choosing the right foundation, one that provides excellent coverage but is still lightweight.
Two foundations with greater coverage that I highly recommend are KVD Beauty Good Apple Full-Coverage Serum Foundation and Doll 10 T.C.E. Super Coverage Serum Makeup.
Here’s a quick way to test how much coverage a product really has: apply it on top of the vein on the underside of your wrist. If a product has really good coverage, you won’t be able to see the vein. Both of these foundations completely covered up that blue color.
When I applied the KVD foundation to the other side of my face, I used the same method as before. I gave it a good shake and applied it just to my cheek first, pressing it in where I needed the most coverage. A little of this goes a very long way. It did a great job of covering the redness, so I brought what was left on my brush down toward my jawline, added just a touch more over the age spots, pressed it in, and blended. I think you’ll see what a great job this foundation does of covering up age spots, and I get just as good coverage with the Doll 10 foundation as well.
Secret 5: Use Concealer Instead Of Foundation
Secret number five is to use a different makeup product altogether for coverage. Instead of foundation, use concealer just on the areas that need the most coverage. You’ll definitely want a concealer with really good coverage, and two of my favorites are Clinique Even Better All-Over Concealer + Eraser and Natasha Denona Hy-Glam Concealer.
When I did the wrist test with both concealers, you could still see the vein itself, but you couldn’t see the blue of the vein.
To show how coverage looks with just concealer, I removed the foundation from one side of my face and reapplied moisturizer. Without foundation, you can certainly see all the redness and all the age spots. I gave the Natasha Denona concealer a try, since I’m almost out of my Clinique concealer, and dotted it on just the areas where I needed the most coverage. Then I pressed it in first to get the best coverage, and wow, those age spots totally disappeared. This is amazing coverage. Just a few dots of concealer completely covered my age spots and the redness.
Finally, I patted over it with a dampened makeup sponge. This really helps meld everything together, because I’m pressing it in, and once again it adds some good moisture to the face.
What’s Your Favorite Way To Get Coverage?
I hope you found these secrets helpful. I’d love to know in the comments below your favorite way of creating coverage that works best for your skin. Thank you so much for giving me the gift of your time. Until we see each other again, I wish you good health and happiness, and I hope you have a fabulous rest of your day!
About the Author:
Elise Marquam-Jahns is a professional, working makeup-artist who is passionate about helping women 45+ get their glow back. In addition to her work as a makeup artist for a major cosmetics line, she founded Boomer and Beyond Beauty. She is also an author and a speaker. Be sure to check out Elise’s YouTube channel which specifically focuses on makeup tips, techniques, and product reviews for those of us 45+ and don’t forget to subscribe. She also does personalized online Zoom makeup consultations so be sure to contact her at boomerandbeyondbeauty@gmail.com if you’d like to work with her. And, if you’d like to receive more inspiration each week, check out her weekly newsletter here.